Adding real-time chat in 14 lines of code with Laravel Reverb and Livewire
Published: 1 month ago- Then I upgraded to Laravel 11...
- Install Reverb
- Broadcast an event
- Listen for the event
- Going to production
Heads up: The chat mechanic (conversations and messages) and UI was already built, this tutorial is simply about adding real-time functionality.
I'd promised myself that I wouldn't spend a lot of time working on our built-in chat feature.
Why? Because it's not really a core feature of the platform.
I mean, sure, when you want to reach out to a developer, some sort of messaging feature makes sense, but a convo usually looks like this:
1Team: Hi there, I'd love to talk to you about a role we've got2 available that I think you'd be a great fit for.34Dev: Cool! Thanks for reaching out. My email is ***@***.com,5 let's set up a call.That's to say, conversation density isn't particularly high, so:
- A screen where you need to refresh to see new messages seems fine,
- Getting a notification for each new message isn't unreasonable, and,
- It doesn't need to be real-time.
And on top of that, no one has been crying out for this.
So it's not like there's a strong business case for this at all.
But...
Then I upgraded to Laravel 11...
And one of the things that's been on my list for a while is to deploy Reverb to production and see how it holds up.
So that was the only excuse I needed to upgrade our chat to be a real-time chat.
(I do have other legit reasons to use WebSockets on Laradir on the horizon, but Messaging is the only live feature that really makes sense to try it out with for now.)
And you know, it's kind of grotesque just how damn easy it is to do! 🫢
Install Reverb
I've opted for installing Reverb into Laradir, rather than setting it up as a separate service. At this stage, this is fine and keeps the whole thing manageable.
Getting it installed was super easy in L11:
1php artisan install:broadcastingThis takes care of everything to get your app ready to run and use Reverb. ✅
A note on local development setup
I'm running Reverb locally as a Laravel Herd service. So during development I'm not actually exercising the Reverb installed in my application, I'm just connecting to an "external" service.
That means I needed to use Herd's Reverb config in my .env instead of the config that the Reverb install command gave me.
I know that this doesn't look exactly like production.
There may be gotchas between dev and prod if Herd's Reverb version is different to Laradir's Reverb.
But I'm ok with it for now as it saves me having to remember to run Reverb locally, because it's always running.
Convenience FTW!
Broadcast an event
Did you know that you don't even need to create an Event class to do this? Model Broadcasting makes this part super easy too!
Each message is already represented by a Message model, so all I had to do was add the following to it:
1namespace App\Models; 2 3use Illuminate\Database\Eloquent\BroadcastsEvents; 4 5class Message extends Model 6{ 7 use BroadcastsEvents; 8 9 public function broadcastOn(string $event): array 10 {11 return [$this->conversation, $this->user];12 } 13}The BroadcastsEvents trait will broadcast events for all the model events that occur (created, updated etc).
That's saved a ton of wiring.
The broadcastOn method just tells Laravel which channels to broadcast on. It can accept model instances in place of Channel instances and will use predictable conventions to set channel name and other details.
Note that I'm broadcasting on the $this->conversation, which is a belongsTo relationship—every Message belongs to a Conversation.
So Laravel's model broadcasting will translate $this->conversation (which is a Conversation instance) to a channel name that looks like this: 'App.Models.Conversation.{id}'.
Listen for the event
So with Reverb installed and my model broadcasting events, there's only one piece left: listen for broadcasted events and update the page when the ones I care about come through.
Authenticate
Model broadcasting uses private channels by default, and these require authentication.
Laravel Echo takes care of the details, but I just need to add the callback hook to process the authentication request.
These typically go in your routes/channels.php file.
In this case, all I need to do is prove that the authenticated user has access to this conversation:
1Broadcast::channel('App.Models.Conversation.{id}', function ($user, $id) {2 return $user->conversations->firstOrFail('id', $id)->exists;3});This gives Echo a token that it can use to subscribe securely to the private channel. Anyone who doesn't have their own token can't subscribe to this channel and won't be able to snoop on any messages sent across it.
Handling new messages
This fundamentally comes down to writing some code that listens for the event on the appropriate channel using Laravel Echo.
I've done this before using Javascript, so I start reaching for my trusty <script... and then had a thought: "I wonder if Livewire has any conveniences for this..."
So all I need to do is add a listener in Livewire and tie it to an appropriate method that will update the state of the component.
There are a few ways to do this, but I liked the getListeners approach for how I'm working with this for now as this is all I needed to add to my Livewire component:
1public function getListeners(): array2{3 return [4 "echo-private:App.Models.Conversation.{$this->conversation->id},.MessageCreated" => 'refresh',5 ];6}I'm using a traditional class-based Livewire component for the Messages feature.
The thing to spot here is the special prefix for the event listener:
- Livewire uses
echo:andecho-private:as its indicator to connect to the specified channel on the WebSocket. - Laravel's conventions for model broadcasting defint the event names
.{ModelName}{EventType}(note the period at the start).
In my case, I only care about the MessageCreated event as messages can't currently be updated or deleted. So I add .MessageCreated to the listener definition.
Then I simply tell Livewire the method name that I want it to call when one of these events comes over the socket, in this case just a belt-and-braces refresh.
Some things to note:
- The event data coming from Reverb contains all of the serialized model data, which is going over the wire to Reverb and then being broadcast to all connected clients. I'm not using this at all here, so that's a bit wasteful.
- You may want to hide some model attributes—define a
broadcastWithmethod on your model. - Simply refreshing the component is a lazy approach, but it will suffice for now.
Going to production
Laradir deploys via Forge.
Forge has awesome first-party support for Reverb, that configures your server and application with a simple switch toggle.
But it doesn't explain everything you need to do.
By default, Forge will serve Reverb through nginx as a reverse proxy. This means nginx handles termination of your TLS connections so that Reverb doesn't have to.
I found that it didn't set up my .env quite right, so I needed to make some changes. Make sure the following keys look something like this:
1REVERB_SERVER_HOST="0.0.0.0"2REVERB_SERVER_PORT=80803REVERB_HOST=ws.laradir.com4REVERB_PORT=4435REVERB_SCHEME="https"Specifically, I needed to add the REVERB_SERVER_* keys and REVERB_SERVER_HOST needed to be 0.0.0.0.
You'll need to point the subdomain ws (e.g. ws.laradir.com) to the server that's running Reverb.
You can choose a domain name, but it's an option provided at the beginning of the process and I'm not sure how easy it is to change once it's set.
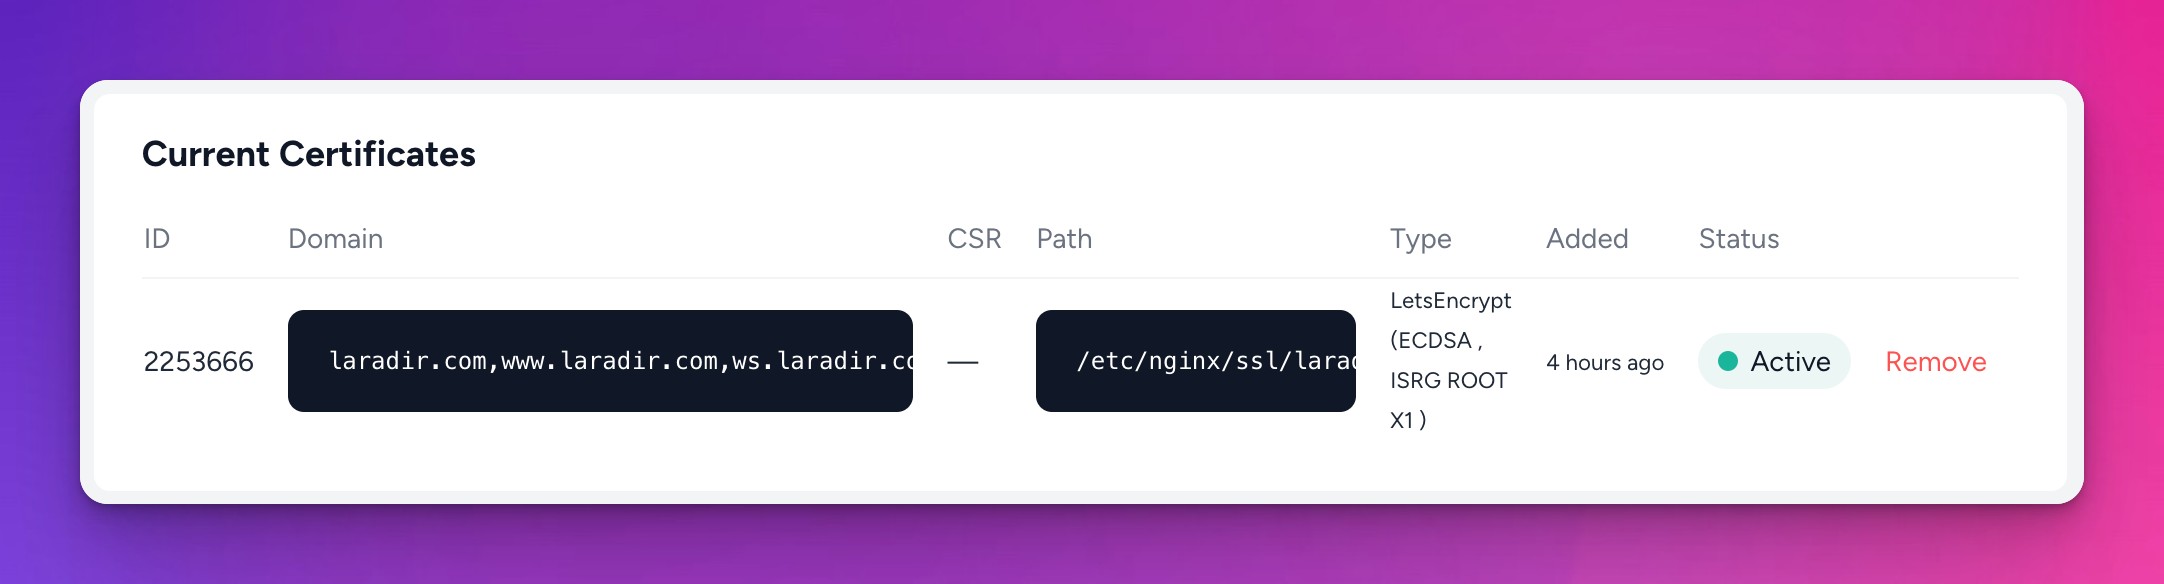
You definitely want your WebSockets to run over TLS, so you will also need to provision a TLS certificate for this domain.
If you're running Reverb from the same app, you may need to re-provision the certificate for all the domains you're using to access the app, because you can only have one active cert at a time.
But that's it. In just 14 lines of code I added real-time chat to Laradir.
Want to try it out? You'll need to sign up for a free account and connect with a developer.
Enjoy!

Simon Hamp
I run Laradir. I'm a long-time Laravel developer and I love helping other Laravel devs to excel.
Follow me on Twitter